Birty Dastards Jeep Club

Please login or register.

Login with username, password and session length
Advanced search  
Pages: [1]   Go Down

Author Topic: AW4 tiptronic controller (XJ auto 'box)  (Read 4128 times)

0 Members and 1 Guest are viewing this topic.

Big-G

  • Guest
AW4 tiptronic controller (XJ auto 'box)
« on: January 15, 2014, 12:20:41 PM »

This is a copy of a thread from a couple of other jeep forums. I have recently started work on it again, and hopefully it will be available soon. Just thought i would share with you guys  :icon_winkle:


I found this topic on NAXJA forums, http://www.naxja.org/forum/showthread.php?t=103658&page=1, and it inspired me to build a tiptronic controller of the same design.

The only drawback is that on OBDII jeeps, the check engine light is on for 50 key turns after the tiptronic is used, this is an issue I would like to fix.

After a lot of mucking about on eagle with schematics and PCB layouts, i finally got to the stage of breadboring.

The board was going to cost around £15 to make, with £15 of components and a lot of my time, to solder the board up. This would mean it would either be an involved project for anyone that wanted to do it, or it would take up a lot of my time making the boards. Getting them fully made by a company in such small quantities is also very costly.

I have a friend helping me on this, and we have been discussing it and working though it to add a few more features. Whist working though it, we came up with the idea of using a PLC instead.

A PLC (Programmable Logic Controller) is a device that uses software to control stuff, very much like an ECU. The idea behind Kevin fletcher’s tiptronic controller was to keep it simple. I feel that a PLC makes it even simpler still.

The PLC costs around £25, and then you need switches and a box on top, but this is the same as the board anyway. All the PLC needs to do the same job as the board is a bit software. This means I can now write the software, and anyone can buy the board, solder a few wires and that’s it. It also means that if I ever want to add more features, all you would need to do is upload the new software via a usb cable.

I am now at the stage of buying one of the PLC’s (called an arduino UNO) and writing the software, to prove the concept. If it works, I will then release the software to the public, with a full write up on how to install it.

At the moment the system has the following features:
- Takes control from the factory TCU.
- Provides manual up/down shift from 1st to 4th
- Provides a torque converter lock, which dis-engages when changing gear
- Has an led readout that shows what gear you are in, 1-4, and if the TC is locked

You switch to the tiptronic whilst in neutral, it boots up into 3rd gear as standard. You then select 1st and move into drive. If you go down the gears with the gear stick, you will limit what the tiptronic controller can do, so leave it in D.

I am hoping to add the following features soon
- TC lock dis-engage when braking
- TC lock dis-engage on gear change then re-engage after, enabled and disabled by holding the TC button down for 5 secs, notified by TC lock led flashing twice.
- Stop check engine light coming on.
- Use of arduino PRO mini – which only costs £13, and is 20mm by 30mm, reducing package size massively.
- Sense what gear you are currently in, hold that gear, and then turn the TCU off.
- Make sure the TCU has full control before the tiptronic shuts down.

If anyone is interested in one, please let me know (I know some already have). Also please bear in mind that I have a full time job and life, and can’t spend all hours of the day on it, so don’t expect on up and running next week. I also accept no responsibility if you break your car or yourself. This is not intended for highway use and should only be used offroad.   

I have the up/down switch made, this is my idea and of my design and im sorry to say i wont be supplying them.


This shows the action inside the switch


I also have made a faceplate which takes the TC button too


This is the on/off switch and the tc lock button


This is the arduino, the brains which the code is uploaded too. It is just smaller than a credit card.


I also received a LED display, a driver chip (4511) and some TIP120 transistors. I have been breadboaring it up today, and so far have the switches working with the arduino, and the driver driving the display.


--------------------------------------------------------------------------------

Spent the last two nights on programming, Have been learning ardunio code with my mate who's doing most of the programming.

So far we've got to the alpha stage, it's a bit of a skeleton program at the moment, but it's getting there :)

I took a quick vid, sorry for the rubbish quality, I was excited and only had my phone.

Top led on the right represents the TCU relay, followed by the TC lock solenoid, and gear solenoids. TC lock didn't work right now, but as you can see, it sees what gear it's in when it gets turned on, turns the TCU off and takes the gear.

****Video Broken****
Logged

Big-G

  • Guest
Re: AW4 tiptronic controller (XJ auto 'box)
« Reply #1 on: January 15, 2014, 12:23:34 PM »

Hi guys, at a major point in the project, I'm now at the testing phase.

We have finished the program to the beta stage, which means we are at the stage of putting it into the car and seeing what happens. So hopefully next week it will be going into the jeep :D.

If anyone is interested in the code, here it is.

Please bear in mind I haven't tested this in the jeep yet, but if anyone wants to have a go at the project, feel free. Any feedback I can get is good :)

/*******************************************************************************
Written by Fish, Logic by Big-G
*
* Tiptronic gearbox controllor for Jeep AW4.
* Changes up and down gears, provides torque conveter lockup and
* a 7 segment led display readout of which gear you are in.
*
*******************************************************************************/


// function prototypes
void power_up();
void power_down();
void chng_to( int );
void abend();
void flash_disp();
int  get_gear();
void handle_event( int );
void tcu_ctrl( int );
void tcl_ctrl( int );

// Define our pins - modify to ease hardware layout

const int p_in_sol1    = A0;
const int p_in_sol2    = A1;
const int p_in_onoff    = 2;
const int p_out_tcu    = 3;
const int p_in_up    = 4;
const int p_in_down    = 5;
const int p_in_tcl    = 6;
const int p_out_sol1    = 7;
const int p_out_sol2    = 8;
const int p_out_sol_tcl    = 9;
const int p_out_leddp    = 10;
const int p_out_led1    = 11;
const int p_out_led2    = 12;
const int p_out_led3    = 13;

// Events
const int ev_power_change = 1;
const int ev_changeup    = 2;
const int ev_changedown    = 3;
const int ev_tcl_change    = 4;

// Other constants
const int boot_delay    = 1000;
const int pwr_up_delay    = 1000;
const long debounce_delay = 10;
const int tcl_delay    = 250;
const int tcl_long_press = 2000;

// State variables
int running             = 0;
int tcl_running         = 0;
int current_gear    = 0;
int current_up_state    = 0;
int current_down_state    = 0;
int current_on_state    = 0;
int current_tcl_state    = 0;
int last_up_state    = 0;
int last_down_state    = 0;
int last_on_state    = 0;
int last_tcl_state    = 0;
int last_tcl_on_time    = 0;
int auto_tcl_mode       = 0;

// switch debounce tracking
long last_debounce_time = 0;


void setup() {
   // define pins as inputs or outputs
   pinMode( p_in_sol1, INPUT );
   pinMode( p_in_sol2, INPUT );
   pinMode( p_in_onoff, INPUT );
   pinMode( p_out_tcu, OUTPUT );
   pinMode( p_in_up, INPUT );
   pinMode( p_in_down, INPUT );
   pinMode( p_in_tcl, INPUT );   
   pinMode( p_out_sol1, OUTPUT );
   pinMode( p_out_sol2, OUTPUT );
   pinMode( p_out_sol_tcl, OUTPUT );
   pinMode( p_out_leddp, OUTPUT );
   pinMode( p_out_led1, OUTPUT );
   pinMode( p_out_led2, OUTPUT );
   pinMode( p_out_led3, OUTPUT );

   Serial.begin(9600);
Serial.print("Starting...\n");

   // power-up steps
   tcu_ctrl( 1 );                // turn on power to the TCU
   delay( boot_delay );        // hang on a god-damned second
   current_gear = get_gear();
}

void loop() {

   int up_state    = digitalRead( p_in_up );
   int down_state    = digitalRead( p_in_down );
   int on_state    = digitalRead( p_in_onoff );
       int tcl_state    = digitalRead( p_in_tcl );

   if (
           up_state    != last_up_state
       ||    down_state    != last_down_state
       ||    on_state    != last_on_state
       ||    tcl_state    != last_tcl_state
   ) {
       last_debounce_time = millis();
   }

   if ( (millis() - last_debounce_time) > debounce_delay ) {
       if ( up_state != current_up_state ) {
                       current_up_state = up_state;
           if ( current_up_state ) {
                           handle_event( ev_changeup );
                       }
               }
       if ( down_state != current_down_state ) {
                       current_down_state = down_state;
           if ( current_down_state ) {
               handle_event( ev_changedown );
                       }
               }
       if ( on_state != current_on_state ) {
                       current_on_state = on_state;
                       if ( current_on_state != running ) {
                     handle_event( ev_power_change );
                       }
               }
       if ( tcl_state != current_tcl_state ) {
                       current_tcl_state = tcl_state;
                       auto_tcl_mode = 0;
           if ( current_tcl_state ) { // momentary switch
                           last_tcl_on_time = millis();
               handle_event( ev_tcl_change );
                       } else {
                           if ( ( millis() - last_tcl_on_time ) > tcl_long_press ) { // long press
                               // auto_tcl_mode = 1;
                           }
                       }
               }
   }
   last_up_state = up_state;
   last_down_state = down_state;
   last_on_state = on_state;
   last_tcl_state = tcl_state;

       if ( (get_gear() != current_gear ) && running ) {
       abend();
       }
}

void handle_event( int ev ) {

   switch(ev) {
       case ev_changeup :
           if ( ! running ) break;
           switch( current_gear ) {
               case 4 :
                   //flash_disp();
                   break;
               default :
                   chng_to( ++current_gear );
                   break;
           }
           break;
       case ev_changedown :
           if ( ! running ) break;
           switch( current_gear ) {
               case 1 :
                   //flash_disp();
                   break;
               default :
                   chng_to( --current_gear );
                   break;
           }
           break;
       case ev_power_change :
           if ( running ) {
                           power_down();
                       } else {
                           power_up();
                       }
           break;
       case ev_tcl_change :
           if ( running ) {
                           tcl_running = ! tcl_running;
                           tcl_ctrl( tcl_running );
                       }
           break;
   }
}

void power_up() {
   current_gear = get_gear();
   chng_to( current_gear );    // set solenoids and LEDs
   tcu_ctrl( 0 );            // kill the TCU
   delay( pwr_up_delay );        // hang on a god-damned second
   if ( get_gear() == current_gear ) {
       running = 1;
   } else {
       abend();
   }
}

void power_down() {
   // kill power to the gear solenoids
   digitalWrite( p_out_sol1, 0 );
   digitalWrite( p_out_sol2, 0 );
   tcl_ctrl( 0 );          // turn off the tcl
   tcu_ctrl( 1 );        // turn on power to the TCU
   // blank the display
   digitalWrite( p_out_led1, 0 );
   digitalWrite( p_out_led2, 0 );
   digitalWrite( p_out_led3, 0 );
   running = 0;
}

void chng_to( int new_gear ) {

       tcl_ctrl( 0 );
       delay( tcl_delay );

   switch( new_gear ) {
       case 1 :
           // gear solenoids
           
           digitalWrite( p_out_sol1, 1 );
           digitalWrite( p_out_sol2, 0 );

           // LED display
           digitalWrite( p_out_led1, 1 );
           digitalWrite( p_out_led2, 0 );
           digitalWrite( p_out_led3, 0 );
           break;

       case 2 :
           // gear solenoids
           
           digitalWrite( p_out_sol1, 1 );
           digitalWrite( p_out_sol2, 1 );

           // LED display
           digitalWrite( p_out_led1, 0 );
           digitalWrite( p_out_led2, 1 );
           digitalWrite( p_out_led3, 0 );
           break;

       case 3 :
           // gear solenoids
           
           digitalWrite( p_out_sol1, 0 );
           digitalWrite( p_out_sol2, 1 );

           // LED display
           digitalWrite( p_out_led1, 1 );
           digitalWrite( p_out_led2, 1 );
           digitalWrite( p_out_led3, 0 );
           break;

       case 4 :
           // gear solenoids
           
           digitalWrite( p_out_sol1, 0 );
           digitalWrite( p_out_sol2, 0 );

           // LED display
           digitalWrite( p_out_led1, 0 );
           digitalWrite( p_out_led2, 0 );
           digitalWrite( p_out_led3, 1 );
           break;
   }

       if ( auto_tcl_mode ) {
           delay( tcl_delay );
           tcl_ctrl( 1 );
       }
}

void abend() {
   // kill power to the gear solenoids
   digitalWrite( p_out_sol1, 0 );
   digitalWrite( p_out_sol2, 0 );
   tcl_ctrl( 0 );          // turn off the tcl
   tcu_ctrl( 1 );        // turn on power to the TCU
   flash_disp();        // warn the driver
   delay( 1000 );
   // blank the display
   digitalWrite( p_out_led1, 0 );
   digitalWrite( p_out_led2, 0 );
   digitalWrite( p_out_led3, 0 );
   running = 0;
}

int get_gear() {
 //return 3;
Serial.print( analogRead( A0 ), DEC );
Serial.print( " - " );
Serial.print( analogRead( A1 ), DEC );
Serial.print( "n" );
   int val_sol1 = analogRead( A0 ) > 500 ? 1 : 0;
   int val_sol2 = analogRead( A1 ) > 500 ? 2 : 0;
   switch ( val_sol1 + val_sol2 ) {
       case 0 : return 4;
       case 1 : return 1;
       case 2 : return 3;
       case 3 : return 2;
   }
}

void flash_disp() {
   // show '0' and flash dp
   //digitalWrite( p_out_led1, 0 );
   //digitalWrite( p_out_led2, 0 );
   //digitalWrite( p_out_led3, 0 );
   //running = 0;

       digitalWrite( p_out_leddp, 1 ); 
       delay(250);             
   digitalWrite( p_out_leddp, 0 );   
         delay(250); 
       digitalWrite( p_out_leddp, 1 ); 
       delay(250);             
   digitalWrite( p_out_leddp, 0 );   
         delay(250);
       digitalWrite( p_out_leddp, 1 ); 
       delay(250);             
   digitalWrite( p_out_leddp, 0 );   
         delay(250);
       digitalWrite( p_out_leddp, 1 ); 
       delay(250);             
   digitalWrite( p_out_leddp, 0 );   
         delay(250);
}

void tcu_ctrl(int on_or_off) {
   digitalWrite( p_out_tcu, on_or_off ? 0 : 1 );
}

void tcl_ctrl(int on_or_off) {
   digitalWrite( p_out_sol_tcl, on_or_off );
       digitalWrite( p_out_leddp, on_or_off );
       tcl_running = on_or_off;
}
   
-----------------------------------------------------------------------------------------------------------------------------

Well.

Lifes been really busy recently. Had alot of stuff to sort out.

Ive been doing bits here and there with the project, but i had to spend a month fixing the jeep so i can actually get to testing this.

Im still pretty stuck on the solenoid driver side, but ive found a local source of 'tronics knowlage that im tapping into :)

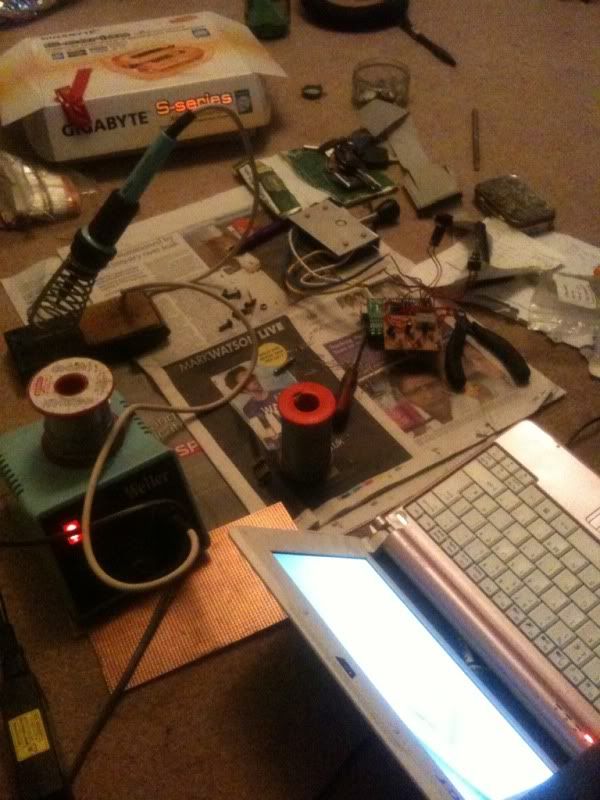
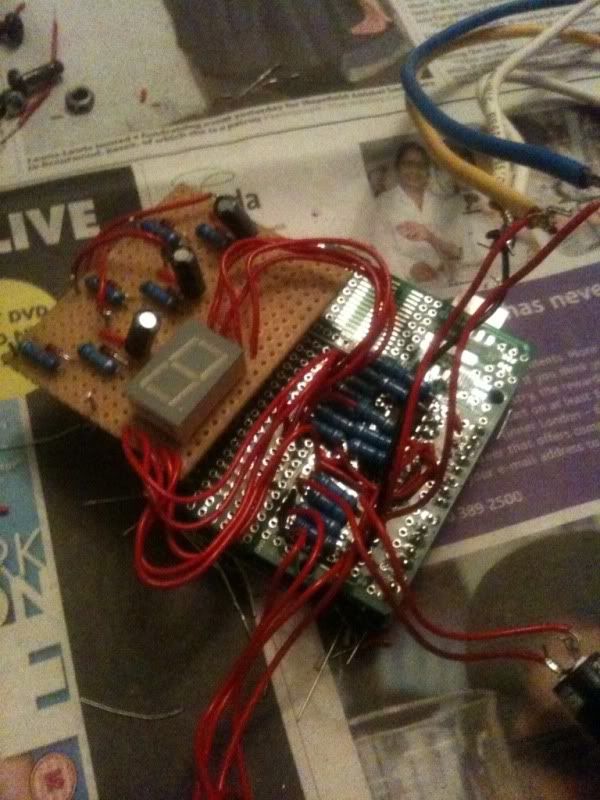
So just to let you all know i havent forgotten about this, and ill leave you with a couple of picutres of how far ive got as of tonight :)


-----------------------------------------------------------------------------------------------------------------------------


Hello!

Sorry it's been so long. I got totally stuck on the high side driver, and after months of searching and trying things with mosfets and stuff I lost interest and banished it to a cupboard.

Recently I was pointed to a website called http://ruggedcircuits.com/ which has a schematic for a high side driver.

I've ordered the parts and spent this evening  bread boarding them and confirmed that it will work for what I want! Really pleased. Big thanks to rugged circuits.

I am currently designing the PCB in eagle, and this should be finished soon. Then it's off to veroboard for prototyping. I had to make some changes to the sensing side of the circuit, using optoisolators. This is yet to be tested, but I'm confident about it.

So all in all, I hope to have it prototyped in a couple of weeks, a bit of testing, and then a PCB made. Can't wait.

Watch this space :)
Logged

XJ Fan

  • Regular Member
  • Forum Member
  • *
  • Guru: 2
  • Offline Offline
  • Posts: 939
  • Vehicle: XJ TD
  • Year: 2001
  • nulla tenaci invia est via
Re: AW4 tiptronic controller (XJ auto 'box)
« Reply #2 on: January 15, 2014, 12:31:38 PM »

It's witchcraft I tell thee.

TBH I have  no idea what that is, but it looks involved and like a lot of effort has gone in to it. I hope it does what you need it to :)
Logged
'94 mk1 XJ 2.5 TD (dead)
'01 mk2 XJ 2.5 TD (my daily drive)
'97 ZJ 4.0 limited (dead)

JamesH

  • Club Member
  • Forum Member
  • *
  • Guru: 1
  • Offline Offline
  • Posts: 4998
  • Vehicle: JK
  • Year: 2010
Re: AW4 tiptronic controller (XJ auto 'box)
« Reply #3 on: January 15, 2014, 01:04:52 PM »

 :imwitstupid:

If it works, I'll buy one. I can cope with the Check Engine light issue as it can probably just be cleared with a code reader as and when needed.

For me (an a lot of other people I'm sure) it will be more attractive to buy if it comes with clear install instructions or is completely packaged up with idiot proof plug and play type connections. I open to building a lever switching assembly and doing a few bits of soldering but much more than this and I can't really be arsed.

I really appreciate the work that has gone into it and that you are openly sharing it all, I think this should be supported so don't be afraid to package something up and put a price tag on it.
Logged

Big-G

  • Guest
Re: AW4 tiptronic controller (XJ auto 'box)
« Reply #4 on: January 15, 2014, 01:15:43 PM »

Wow, Thanks JamesH.

Well hopefully by including 3 power resistors you will only get a check engine light once in a blue moon.

I understand there are people who would like something like this but dont have the skills/knowhow. If people want a pretty much ready to go package thats cool. I have looked into making it plug'n'play, but getting the connectors if hard in the states, let alone here! So it would be a cut and solder/crimp jobby. But it can come all in a box packaged up ready to connect up with instrcutions.

The reason I haven't included switches with it is people will probably want to do there own thing. But that doesnt mean I cant include switches. Its what ever people want really. Some of the features it now has have been suggested by guys on forums ;)

I think there are some people who would like to buy one, and I will only ask my time/parts covered really. So hopefully they wont cost too much :)
Logged

bgbazz

  • Guru
  • *
  • Guru: 0
  • Offline Offline
  • Posts: 4925
  • Vehicle: Was a KJ, now a VW
  • Year: 2003
Re: AW4 tiptronic controller (XJ auto 'box)
« Reply #5 on: January 15, 2014, 01:24:35 PM »

Mate, that's a lot of very clever work you've done..you should factor that in when working out a price.
Logged

wildwood

  • The 1 Tonne Kid
  • Marshal
  • Forum Member
  • *
  • Guru: 14
  • Offline Offline
  • Posts: 5921
Re: AW4 tiptronic controller (XJ auto 'box)
« Reply #6 on: January 15, 2014, 03:11:21 PM »

Epic work.......hats off and all.

I'm sure you'll get  you get some orders :icon_super:
Logged

INYA_CJ

  • Guest
Re: AW4 tiptronic controller (XJ auto 'box)
« Reply #7 on: January 15, 2014, 04:49:07 PM »

Hi Big-G, I like where your going with this Tip-Tronic controller.... Very impressive :icon_super:

I have a couple of questions, are you building in TCL disengage when you activate the brake (lightly touch the brake peddle) as when I'm rock crawling & the truck starts a low speed traction wheel slip(wheel spin) I lightly touch the brake to disengage the TCL to stop the wheel spin & this reduces the torque to the wheel's :peekaboo:
The more important question, will it work on OBD1 cos I'm using this ECU/TCU in my new 'Project-CJ6'. The drive train will be XJ 4.7lit(4.0lit +40thou rebore, 258ci AMC crank & rods) AW4 auto & NP242 or NP231OR transfer case.

Cheers,

AL
Logged

bigjeepzj

  • Club Member
  • Guru
  • *
  • Guru: 22
  • Offline Offline
  • Posts: 3438
  • lift it, brake it, Fix it brake it, fix it again
Re: AW4 tiptronic controller (XJ auto 'box)
« Reply #8 on: January 15, 2014, 05:30:30 PM »

Hi
that's an impressive bit of coding 
Arduino is a cool system to program
i  posted a link about your protect a wile ago
http://www.birtydastards.com/frm/index.php?topic=24585.msg284952#msg284952

Be good to see how well it works

Logged

willo

  • Guru
  • *
  • Guru: 0
  • Offline Offline
  • Posts: 3699
  • Vehicle: CJ7
  • Year: 1982
Re: AW4 tiptronic controller (XJ auto 'box)
« Reply #9 on: January 15, 2014, 07:26:16 PM »

I'm with H, i'd have a go with one of them  :greggmo:
Logged

Big-G

  • Guest
Re: AW4 tiptronic controller (XJ auto 'box)
« Reply #10 on: January 15, 2014, 10:28:03 PM »

Mate, that's a lot of very clever work you've done..you should factor that in when working out a price.

Epic work.......hats off and all.

I'm sure you'll get  you get some orders :icon_super:

Well thanks very much  :icon_biggrin: I didn't really set out to make money from it, but I wanted to make one for myself. Tried to remake Kevin fletchers design, was a pain, so started on the arduino. With the community surrounding the ardunio I thought it would be rude not to share :) Saying that if people want them, I will most defiantly make them  :003:

Hi Big-G, I like where your going with this Tip-Tronic controller.... Very impressive :icon_super:

I have a couple of questions, are you building in TCL disengage when you activate the brake (lightly touch the brake peddle) as when I'm rock crawling & the truck starts a low speed traction wheel slip(wheel spin) I lightly touch the brake to disengage the TCL to stop the wheel spin & this reduces the torque to the wheel's :peekaboo:
The more important question, will it work on OBD1 cos I'm using this ECU/TCU in my new 'Project-CJ6'. The drive train will be XJ 4.7lit(4.0lit +40thou rebore, 258ci AMC crank & rods) AW4 auto & NP242 or NP231OR transfer case.

Cheers,

AL

Thanks INYA_CJ, In answer to your questions -

Yes, one of the recent updates was to include a brake pedal switch input. Yet to finalise the software for TC lockup, but it now dis-engages when you change gear and when you brake. You can also turn it off as normal by using the push button.

I have built it for my jeep, which is OBDI, so I cant see a problem working with your setup. The OBDI ECU doesn't seem to care if the TCU is on or not. OBDII is a bit different. Once I have the system working I have an OBDII jeep to prototype with and get it working with no CEL  :icon_winkle:

Hi
that's an impressive bit of coding 
Arduino is a cool system to program
i  posted a link about your protect a wile ago
http://www.birtydastards.com/frm/index.php?topic=24585.msg284952#msg284952

Be good to see how well it works

Thanks. I cant take full responsibility for it! I have a very good friend who is a very good programmer. He helped me hugely on this. I can just about scrape through C.  :icon_rolleyes:


I'm with H, i'd have a go with one of them  :greggmo:

 :003: Magic.

Thanks for the wicked reception guys  :greggmo:

FYI The PCB layout is nearly done, will post it up ASAP.
Logged
Pages: [1]   Go Up
 

Powered by EzPortal